Today I will show you how you can make your own unusual panel for goals.
This idea was suggested to me by the music streamer Sagdey, when asked how he can make certain kind of design. I thought about it and this is what I got:

I downloaded this panel from the Internet and only added my own details. But you can draw your panel by hand on a piece of paper and take a picture, which is even more interesting.
When choosing a panel, it is important to take into account that our strips, which we will take from the Streamlabs widgets, have a rectangular shape and in some cases it will be difficult to insert them into panels with beveled or rounded edges and preserve the aesthetics.
To work, we need a graphical editor Gimp – https://www.gimp.org/ . It is free, requires no registration, and has enough tools to edit any bitmap images.
Draw or download the panel.
As an example, I took this beauty:

The panel has a beveled edge, so I will do additional manipulations-move the robot’s head and arm to the right. And also here we have a glass or bulb effect-glare, which I want to keep for aesthetics and thereforedivide this image into several layers.
In some cases, this is an unnecessary action and sometimes it is enough just to cut out the “flask/glass” from the image.
We make a screenshot of our screen for broadcasting in 1920×1080, so that it is easier to determine the size of our panel. In general, you can skip this step and adjust the size already in OBS. This is most relevant if the scene in OBS or the monitor you have in a different resolution.

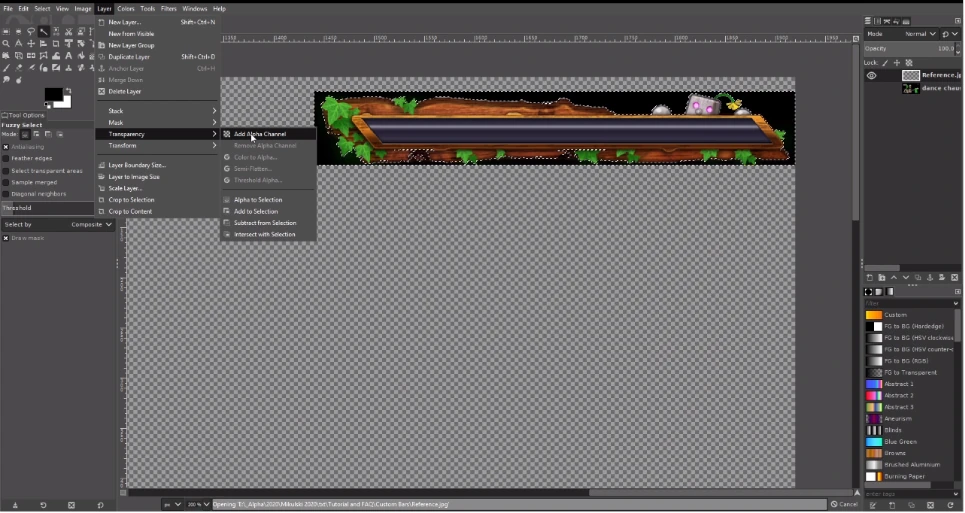
Open the screenshot using Gimp and add our panel there.
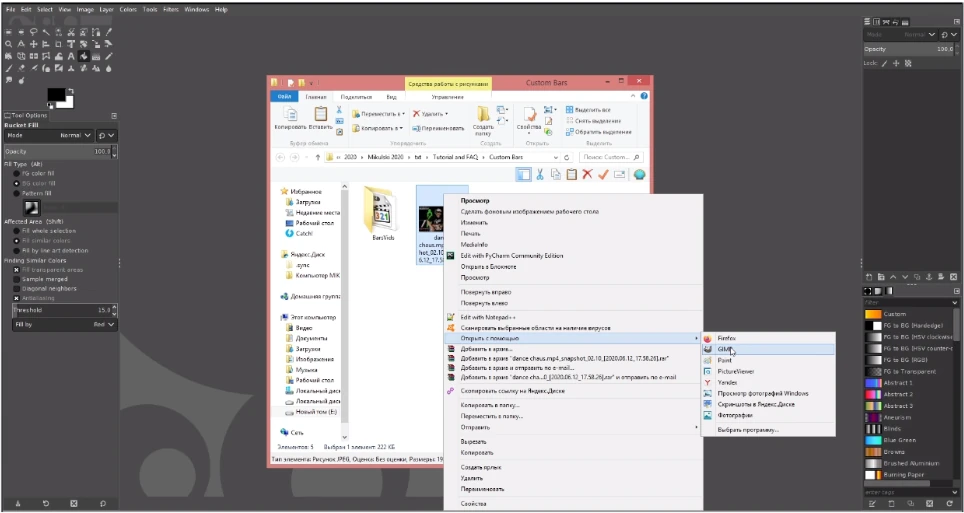
If the panel is in jpeg format or does not have a transparent background, then
the layer with the panel must be assigned transparency: in the panels at the top, Layer
→ Transparency → Add Alpha Channel.
After that, select the Fuzzy Select Tool (Magic wand), the ”U ” key, select the background areas with it and use the Del key to delete them.
After that, you need to remove the selection Ctrl+Shift+A – this is
important, because in the future, the selected area will be determined by the program
as the area that we want to edit.
Therefore, we remove the selection.

We try on our panel on the screen.
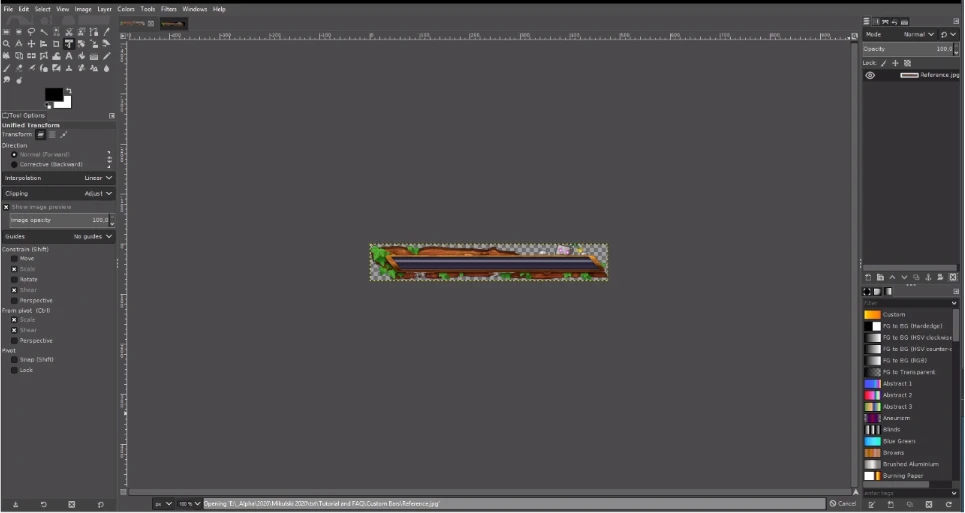
With the help of the transfomation tools Unfied Transform Tool Shift+T and Move Tool, we perform the necessary actions.
I decided to increase the panel slightlywithout loss in image quality.

Remove the layer with the substrate in the layers panel with “X” button below.

Then in the top panels Image → Crop to content to crop everything except our panel.

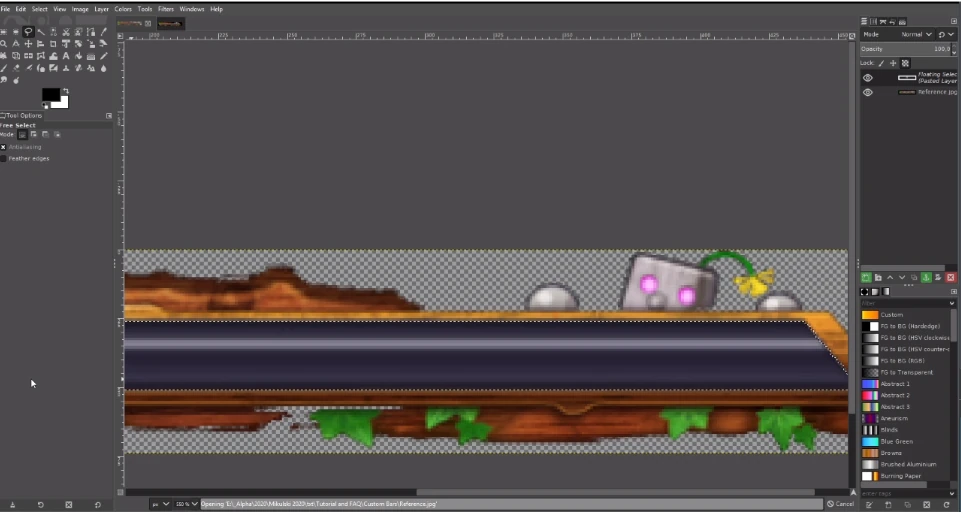
Take the Free Select Tool and outline the inner part of the panel “with glass”.
Ctrl + mouse wheel allows you to scale the screen.


Cut out the selected with Ctrl+X or “Cut selection” using the right mouse button.
Press Ctrl+V and in the layers panel (located on the right by default) click on the “add layer” button (it will be highlighted in green):
Since this panel has beveled edges, most likely our widget line will stick out on the right. I decided to move the robot’s head and arms to the problem area:
Using a rectangular selection, I select the robot, cut it out with Ctrl+X and insert Ctrl+V as a new layer. Then I select his hand with a free selection and also cut and paste it as a separate background. Using the rotation, transformation, and movement tools, I fix all the parts correctly. I use an eraser to remove unnecessary artifacts.
Important! Onlythe layer that is currently selected in the layers panel is edited!
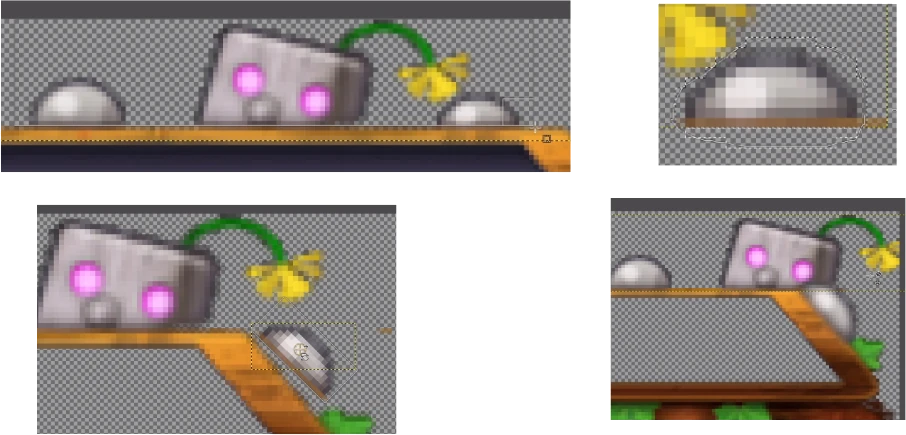
When we have moved everything, select the top layer in the layers panel (but not with glass, we are interested in the robot and its hand). Click the right mouse button and select Merge Down (merge layer with the previous one). We combined the robot with his hand. Now we combine the robot with the panel in the same way.

The final layer began to stick out a little beyond the borders — click in the top panel Layer (Layer) → Layer to Image Size (layer to image size).

Now export the layers separately. Check the visibility of the layer with the panel. And export it in PNG format (you can print the extension, or you can choose from the list) to a separate folder.
File → Export As (Ctrl+Shift+E).
In the pop-up window, we do not change anything.

Disable the visibility of the layer with the panel and enable the visibility of the “glass”, do not move or touch anything and also export.
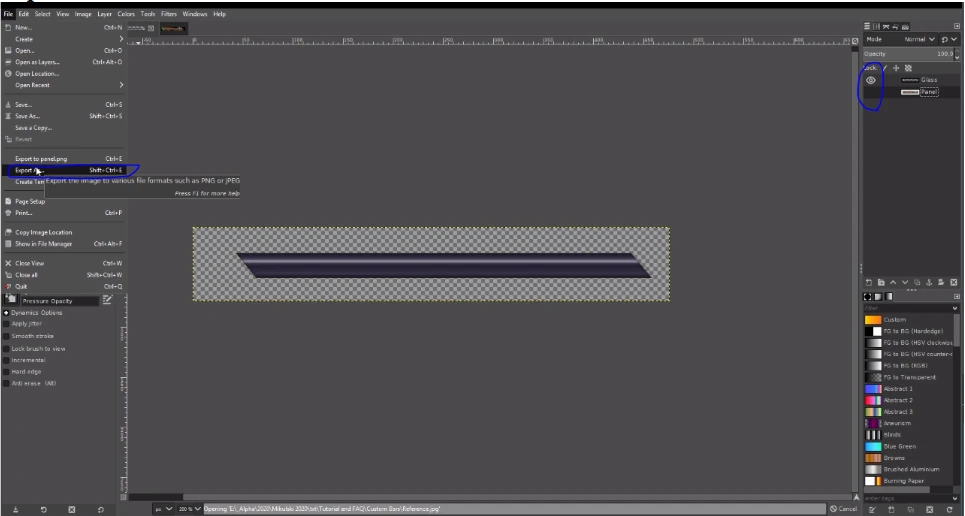
Done! We save the Gimp project, so that if something happens, we can go back and edit it. Don’t close Gimp and go to OBS.
For convenience, we add the same screenshot of our screen that we used to try on the panel in Gimp.
In the Sources menu → click on the ” + ” at the bottom → Image (image). And adding all elements of our panel.
Next, we create the Group source and move our parts of the panel there. Now our parts are grouped and it is possible to move and trace the group source, and not all of them separately.

Right-click on our glass in Sources and select Filters. Click on + and add color correction (Color correction) and reduce the Oppacity (Transparency) to the value you like.

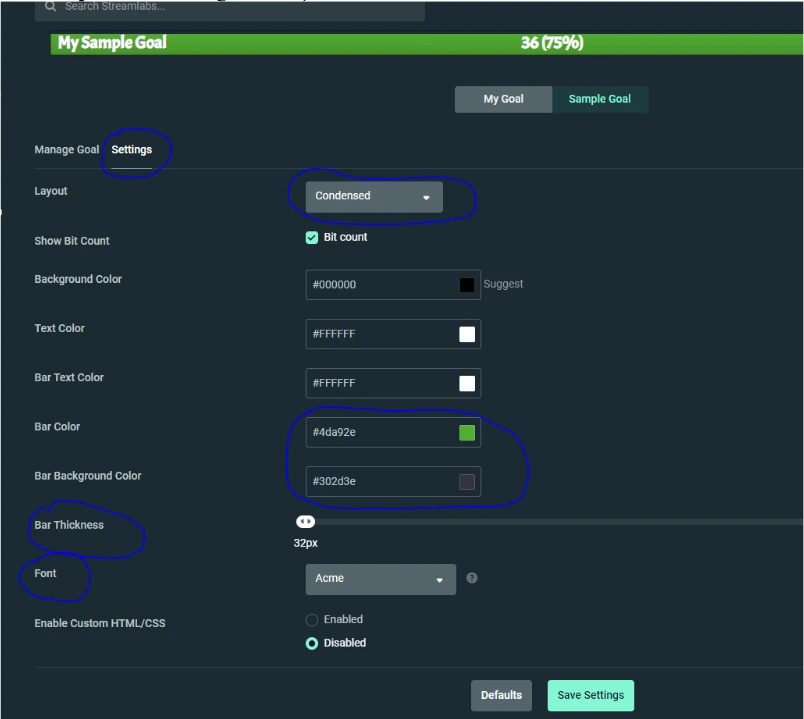
Now we need to add a widget with a goal bar. I use streamlabs, but you can choose any other convenient one — they are slightly different, but in general the principle is the same everywhere.
In the settings, set Layout-Condensed so that the text is located only inside the scale.
Select the desired colors (you can take the color code with a pipette from the panel in Gimp) and the font. As well as the thickness of the scale (usually this is adjusted in a few samples after fitting in OBS).
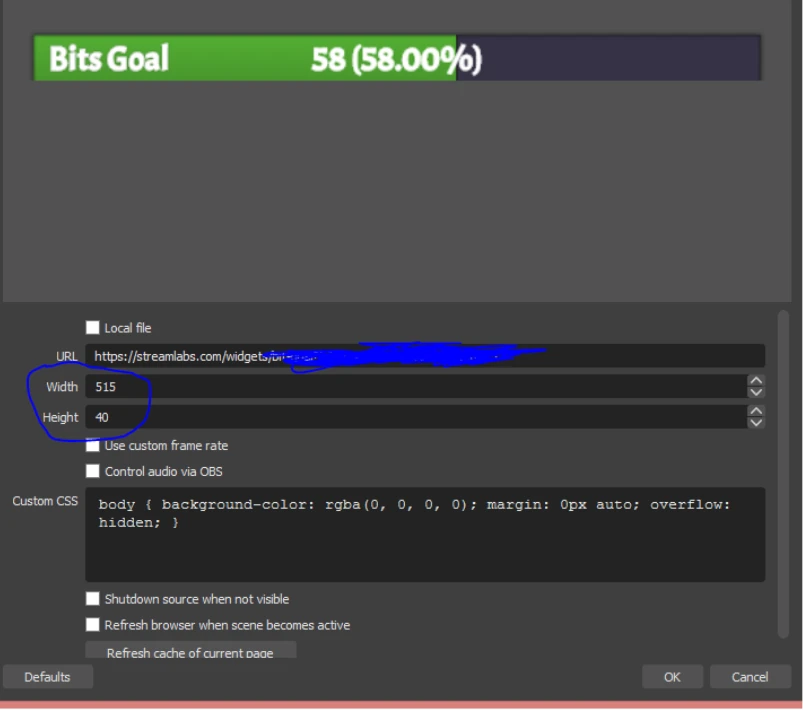
Copy the link to the widget and paste it into the Browser source in OBS. Next, we use the selection method to set the width and height in the widget source until it fits the size of our panel. If necessary, change the thickness of the scale in Streamlabs (do not forget to click Save there to apply the changes).
To more accurately fit our goal bar into the panel, move it with the Ctrl key held down – then the object can be moved freely and will not “stick” to the invisible grid
We move the widget to the group source of our panel and make it the bottom layer.

Go back, if necessary, to the filter with the transparency of the “glass” and set the desired
Done!
