Automatic Shoutouts + their display as an Overlay!
Attention!
This material is designed for the fact that you have read the previous articles on SLCB, or have an idea of how to install scripts and the program as a whole.
Streamlabs Chatbot: Basics
Streamlabs Chatbot: Basics pt.2
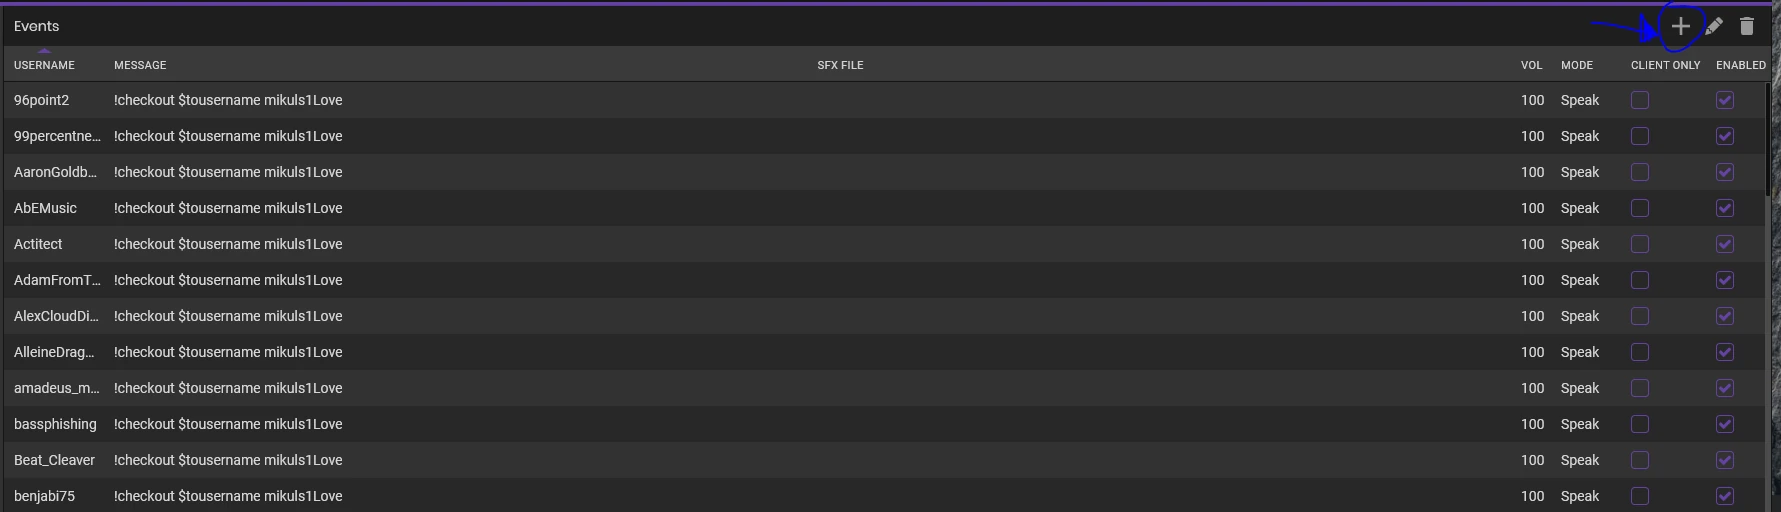
Events
This section, which can be found in the left menu of SLCB, allows you to create an automatic greeting for a specific user on his first message or connection to the channel.
Important point: the bot reacts only once. Therefore, before each stream (if you never turn off the SLCB and the computer), you need to restart the SLCB to charge the events again.
Click on ” + ” and create our event. Or on the “pencil”, if we want to edit the finished event.
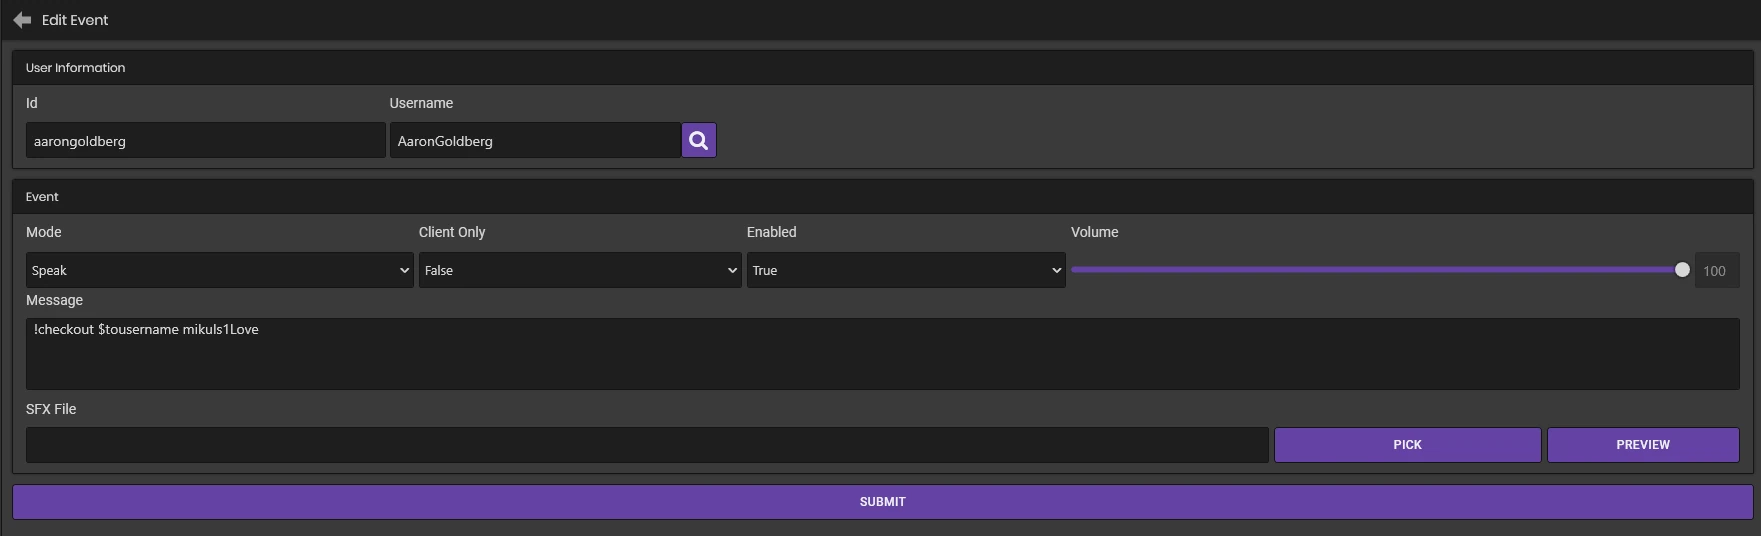
In the Username field, enter the nickname of the desired user and click on the “magnifying glass” icon to copy the name to the Id line.
[Why it is implemented in this way, the manual does not say anything. I >assume< that it is possible to create multiple events per user. In this case, you need to enter the same nickname in the Username string, and make the Id different from the first event for the same user. But I haven’t tested it, so it’s just an assumption from the realm of unsubstantiated theories]

Next is context menu Mode — after what action the bot will respond to the user: Speak-after his first message in the chat; Join-as soon as he entersthe channel.
Client Only-to be honest, I don’t know what this parameter affects. By default, it is set to False, so we leave it.
Enabled – enable / disable the event. True – on. False – off.
Volume – the volume of the audio file. Yes, you can also assign an audio file to events in the SFX File format, similar to the Sound Files section.
Message: The bot’s response to the event, that is, the appearance of our favorite user. We write here a personal greeting, a link to his channel, and so on.
After entering the necessary information, click on the Submit button to make the changes take effect.
Yes, for each individual user, you will have to make a separate event — there is no way without it. But the procedure for creating an event and manipulating copy+paste text takes no more than a minute, and in the future it will save your strength and nerves of your moderators on typing !shoutout commands, especially if you have a lot of friends-streamers. There is also one trick that will allow you to issue an ordinary bot response to the !shoutout command, so that you do not have to edit the link to a friendly channel for each event. More on this later.
Automatic shoutouts
The bot is unable to respond to his own commands. This means that if you write in the event message !so mikulski_, the message will, of course, appear in the chat, but the !so command will not be executed and nothing will happen. At the time, this put me in a dead end, because I wanted the
standard !so message to appear when a streamer friend appeared in the chat, and his avatar with a link to the channel became visible on the screen.
However, the solution came to me quickly enough: all I need is a second bot of a third-party service that would read the command from SLCB, and the response would issue a !so command for SLCB to which SLCB would already respond. Yes, I agree, this is a somewhat cumbersome system and requires a little more copy / paste movements than if you assign a couple of welcome
events for favorites, and use your hands to write the shoutouts for the the overlay. But still, adding a new user to the list still takes at most a couple of minutes, so it’s still a good solution.
For auxiliary purposes, I use Nightbot – https://nightbot.tv. You just need to log in to the site through your Twitch account and the bot will be available. Also, the bot will need to be appointed as a moderator — this will come in handy. However, you can use any other bot — the principle is the same everywhere.
First of all, we need the !so command in the Commands section of SLCB. Something like this:
Hi! Check out $targetname (a parameter of the name that we specify to the bot) on the channel $url (a parameter with a link to the channel of the specified user).
The output will look like this: Hi! Check out Mikulski_ on the channel https://www.twitch.tv/mikulski_
You can also use the $game parameter-which will show the last category that the streamer broadcast.
Permission can also be set to Moderator, so that the bot responds to requests from the Moderator and above (for this purpose, the auxiliary bot must be to appointed as a moderator).
Procedure:
In SLCB, we create an event and enter a nickname in the Username, click the “magnifier”, select the text in the Id and copy it. In the Message, type an exclamation mark and paste the nickname from the clipboard (for example: !mikulski_). Click Submit and go to Nightbot.

In the Nightbot, go to the Commands – Custom section (do not forget to disable unnecessary commands in the next Default section). And click the Add Command button to create a new command.

In the Command line, type “!” And paste the nickname from the clipboard. In the Message line, type !so, space, and again insert the nickname from the clipboard. Set Userlevel to Moderator (if necessary) and confirm the changes with the Submit button.

That’s it! Now, when the user appears in the chat and writes something, this chain will work:
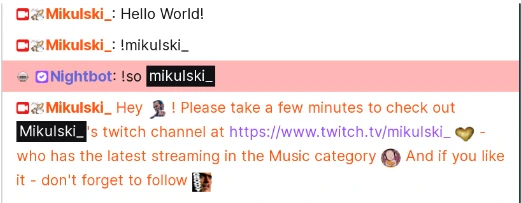
!
SpaceMelodyLab read the article and suggested how to optimize the chain of actions that I described above. In fact, you can do just one command in the Nightbot — so you don’t have to duplicate the response from the event. You just need to substitute variables that read the nickname following the command:
In the nightbot, we create a command (for example, !checkout) in the response, we write: !so $(touser)
And in all SLCB events, we insert in the response: !checkout $targetname
Now, if we want to add a new streamer, we just need to create a new event and insert a template.
Shoutouts on the Screen as an Overlay
It remains only to install and configure the Shoutout Overlay script https://github.com/camalot/chatbot-shoutout (how to install scripts is described in previous articles).
Import the script into SLCB, select Shoutout Overlay from the list, right- click on it and select Insert API key in the context menu (I forgot to mention this earlier, but for some scripts to work, you need to do this procedure).
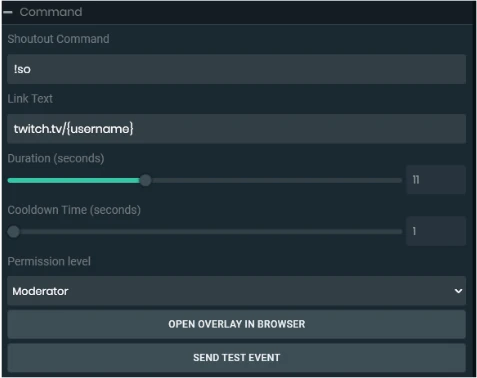
In the script settings, we will see:
Shoutout Command – the command that the script will respond to. By default !so
Link Text – the text of the link displayed on the screen. {username} – parameter.
Duration — the duration of the display of the overlay on the screen in seconds.
Cooldown Time
Permission
And also two buttons: Open Overlay In Browser-open the overlay in the browser. Click this button and copy the address from the browser bar. Create a Browser in OBS source, put the check-box “Local file” and paste the copied address (file/// – you can delete and leave everything that follows: C:/ and all the rest of the path). We specify the length and width according to the size of our screen. And put a tick in the checkbox “Shut down, when the invisible” and “Refresh when it becomes active.”
Send Test Event
Next are “Style” the widget image settings: colors, shadow, animations and the shape of the logo.

After finishing the settings, do not forget to click at the very bottom on Save Settings and update the list of scripts with the button on the right-at the top of the screen. Then send a test alert and see the result.
As you can see, there is nothing particularly difficult about this. It may seem confusing at first, but in reality, this task is solved very quickly. I hope this information is useful to you and will inspire you to come up with new ideas for your streams. For example, I still use the auxiliary bot to select a random background. SLCB reads a line from a text file with a list of background commands, writes it to the chat, the Nightbot duplicates it in its response, and then SLCB responds to the command received from the Nightbot and switches the background. Maybe you will find an original use for this feature.