1. Introduction
Streamlabs Chatbot this is a free and powerful tool that solves many streamer tasks. This article is not an advertisement, I just share my experience of using this program and tell you about its functions that I use myself.
Do not be afraid of difficulties: for a beginner, setting up the bot component may seem a confusing and time-consuming process. But everything is much simpler than it seems. Yes, it will take some time to get used to it, but believe me-the convenience, the time gained and the facilitation of the duties of moderators will more than justify themselves in the future! In my example, you can see how a person who has a very weak understanding of programming was able to figure it all out.
I will list a few interesting advantages over conventional bots:
• You can give the bot any name! (Other bot services usually ask for a paid subscription for this.) For the bot, you create a separate twitch account, and therefore decide for yourself what nickname it will have.
But I still recommend using the same account that you stream from as a bot — I’ll explain why later.
• Play audio files on command from the chat! (the default function, does not require the installation of additional scripts or plugins).
• Automatic individual Shoutout/any other messages when a particular person appears in the chat (the default function, does not require the installation of additional scripts or plugins).
• A large number of scripts for every taste, significantly expanding the capabilities of the bot. All of them, as well as a number of other information, can be found in a large and active Discord community dedicated to the bot https://discord.gg/xFcsxft
• Other tools that other services have: own currency (alternative to channel points), timer commands, voting, giveaways, built-in chat games, subscriber lists, etc.
To get acquainted with all the features and available variables for commands, as well as most of the same things that are written here, I strongly recommend that you study the official instructions
https://cdn.streamlabs.com/chatbot/Documentation_Twitch.pdf
2. Installation of components
Important point: Streamlabs Chatbot is a separate program for your computer. That is, for the bot to work, it is necessary that the application is launched and accounts are attached before or during the stream!
1. Download the installer of the program itself from the official Streamlabs website: https://streamlabs.com/chatbot/download
and install.
2. Download Python 2.7, which you will need to run third-party scripts. Note that the Python version must be 2.x!
3.x versions will not work!
https://www.python.org/ftp/python/2.7.13/python-2.7.13.msi
Many recommend installing Python in the root of the disk. For example, C:\Python27 . In any case, remember the directory — it will still be useful.
3. Activating the bot & initial setup
Run the program and after downloading, close the pop-up window.

At the bottom left of the screen, click on the icon with the figure of a
person — this is the section with connections. You need to connect every time you run the program!
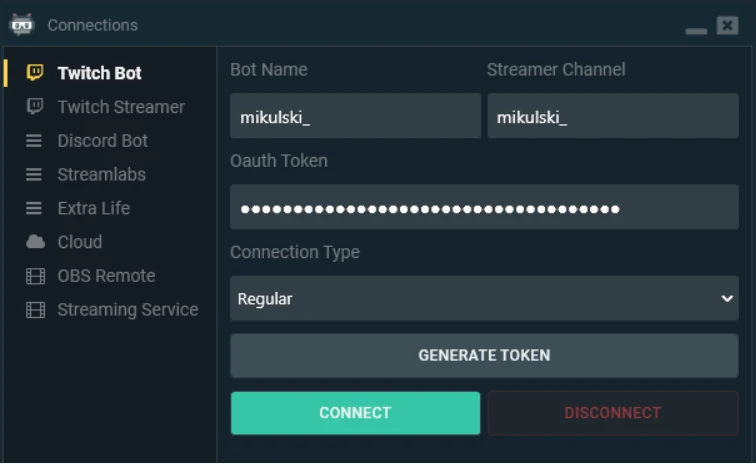
1. The first section is connecting the bot.
In the Bot Name line, write the nickname of the Twitch account created for the bot. Or enter your own nickname. The advantage of using your own account as a bot is that you can use all the available emotes on your channel in commands. However, it seemed to me that the reaction of the bot in this case slows down a little, and some scripts do not work correctly the first time. But this is from the category of speculation and I did not conduct test comparisons.
In the Streamer Channel line, write the nickname of the channel to which the bot will connect.
Next, click Generate Token-the Twitch authorization window will open. Enter the bot account password or your own.
After that, click Connect — and after a couple of moments, the bot will connect to the channel.
You won’t have to enter nicknames in the future. Run the program, Connect and you’re done. But, periodically (every few months), the account is logged out and the step with Generate Token will have to be repeated.

2. The next section of Twitch Streamer: everything is similar here, enter the nickname of our channel, Generate Token — to log in and Connect to make a connection.
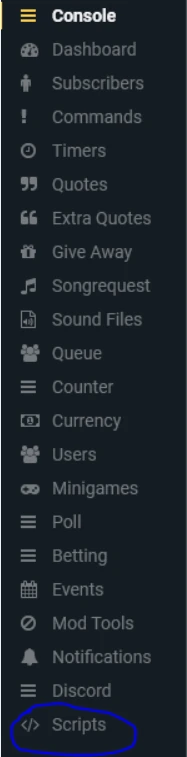
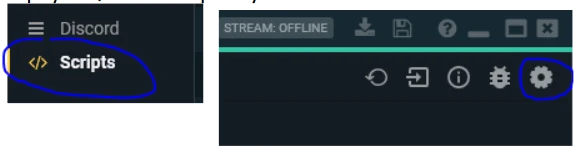
←Please note that after this step, a new Scripts menu will appear in the panel on the left. Without Twitch Streamer connection — it is not available! Therefore, when you need to edit something in the script settings, do not forget about connect!

- Next comes the section Discord Bot.
The program can publish announcements and messages on a timer, as well as assign a role to new participants. I don’t use it, so I’ll skip this step. In addition, the connection setup there is more complicated — if necessary, then study this point yourself according to the official instructions of the chatbot.
In my opinion, Mee6 or Pingcord is much more convenient and functional for these purposes in Discord.

4. The Streamlabs section. Makes available in the left
panel a menu with notifications about Notifications in the
chat. For example, when someone follows, subscribes,
makes a host, etc. Then a message about this appears in the chat, which you assign yourself (“Thank you for the follow”). Strange, but there is no notification of raids — it will have to be activated through a separate script.
This feature requires an active Streamlabs account https://streamlabs.com, which is instantly created by authorization through the Twitch account.
If you already use Streamlabs for alerts and donations, then it’s fine, if not, then it’s okay to log in there. I myself have Streamlabs and
Streamelements accounts and use them for different purposes. SL for alerts and goal bars, and SE for lists of top gifters, kappagen, and chat.
The actions are still the same: Generate Token, Authorization and Connect.
5. Next are the Extra Life sections (as far as I understand it is some kind of Streamlabs service) and Cloud (for connecting clients of the Dropbox or GoogleDrive cloud service installed on the computer and saving backups in excel format). I don’t use them, so I won’t stop there.
6. OBS Remote.
This is one of the most interesting sections that can radically transform your stream. Using the Obs plugin https://obsproject.com/forum/resources/obs-websocket-remote-control-obs-
studio-from-websockets.466/ and an additional script https://github.com/Consoletation/OBSRemoteParameters you can use commands from the chat to control the visibility of sources and switch scenes.
But about scripts and specific application next time.
So far, we are installing the plugin https://obsproject.com/forum/resources/obs-websocket-remote-control-obs-
studio-from-websockets.466/, then open OBS and in the panel at the top find Tools → Websocket Server Settings. In the pop-up window, put the checkboxes on “Enable WebSockets server” – set the port, for example 4444 and “Enable authorization” – come up with and enter the password.


Back to the chatbot. If you have OBS running on the same computer as the Chatbot, then leave the IP string unchanged 127.0.0.1 . If you have OBS on the second PC, then you need to put its IP here.
Enter the password that we came up with in OBS, put the same port as in OBS and click Connect.
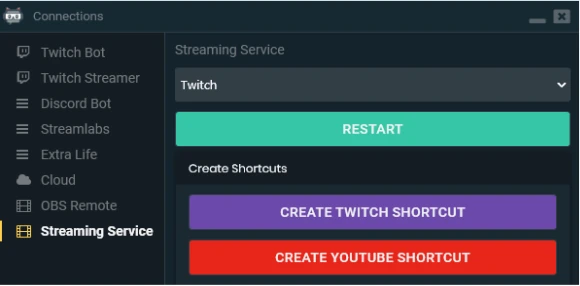
7. The last section is Streaming Service.
Here you can switch the bot from the Twitch account to the Youtube account
To sum up: before each stream, you need to run the program and press the Connect buttons in the sections used. In my case, these are Twitch Bot, Twitch Streamer, Streamlabs, and OBS Remote.
4. Enabling Scripts
In the panel on the left, we find the Scripts menu (do not forget that you need to make a Twitch Streamer connection to make it appear). Next, at the top right, look for the gear and click on it.
Click on the Pick Folder and specify the library directory (Lib) where we installed Python. And also click Generate Api Key.

Go back to the previous screen and click on the Import button to add the script (the script is always in the archive, it is the archive that we specify, it does not need to be unpacked). I recommend creating a separate folder for scripts.

Let’s set OBS Remote Parameters for the sample mentioned above https://github.com/Consoletation/OBSRemoteParameters after that, we reload the scripts on the button. Do not forget to reload after you edit the script settings.

Click on the line of the script that appears in the list. You can also check whether the script will be active in the checkbox. On the right is a panel with settings — different scripts have their own settings. In a specific case, you can read the instructions on how to write the correct command to influence sources.

Well, we’ve covered the basics. In the next article, I will go from general to specific: I will show the implementation of some ideas through commands, go through the functional sections and share the scripts that I use. In the meantime, you can connect yourself and try this program in action, search for scripts suitable for your stream in the Discord community dedicated to Chatbot https://discord.gg/xFcsxft. Configure OBS remote and follow the instructions to add several commands for sources and switching scenes.
I hope this information was useful. I decided to divide this guide into several parts for ease of reading. This part is designed more for beginners and for those who want to quickly “enter” a new program.