Continuing the glorious tradition of documenting Mikulski_Radio modifications, I bring to your attention another post. And it would seem that there is nothing to talk about, because the essence of the request system is the same in Twitch chat and Telegram bot. Just make edits according to the API and you’re done.
However, it turned out that everything was not so simple and nuances were revealed, which I will tell you about today.

The first blunts
Almost as soon as the Telegram bot was ready, I started creating a similar bot for Discord and did not even imagine that a big bummer would be waiting for me.
After trying several instructions, and also trying to use discobot as a basis (which I used to broadcast the radio to the Discord voice channel), the same result was waiting for me everywhere: the bot did not respond to commands from the chat. At the same time, it was connected to the server and displayed among users. In general, after trying to juggle with different settings and not getting a reaction, I left this idea for a while.
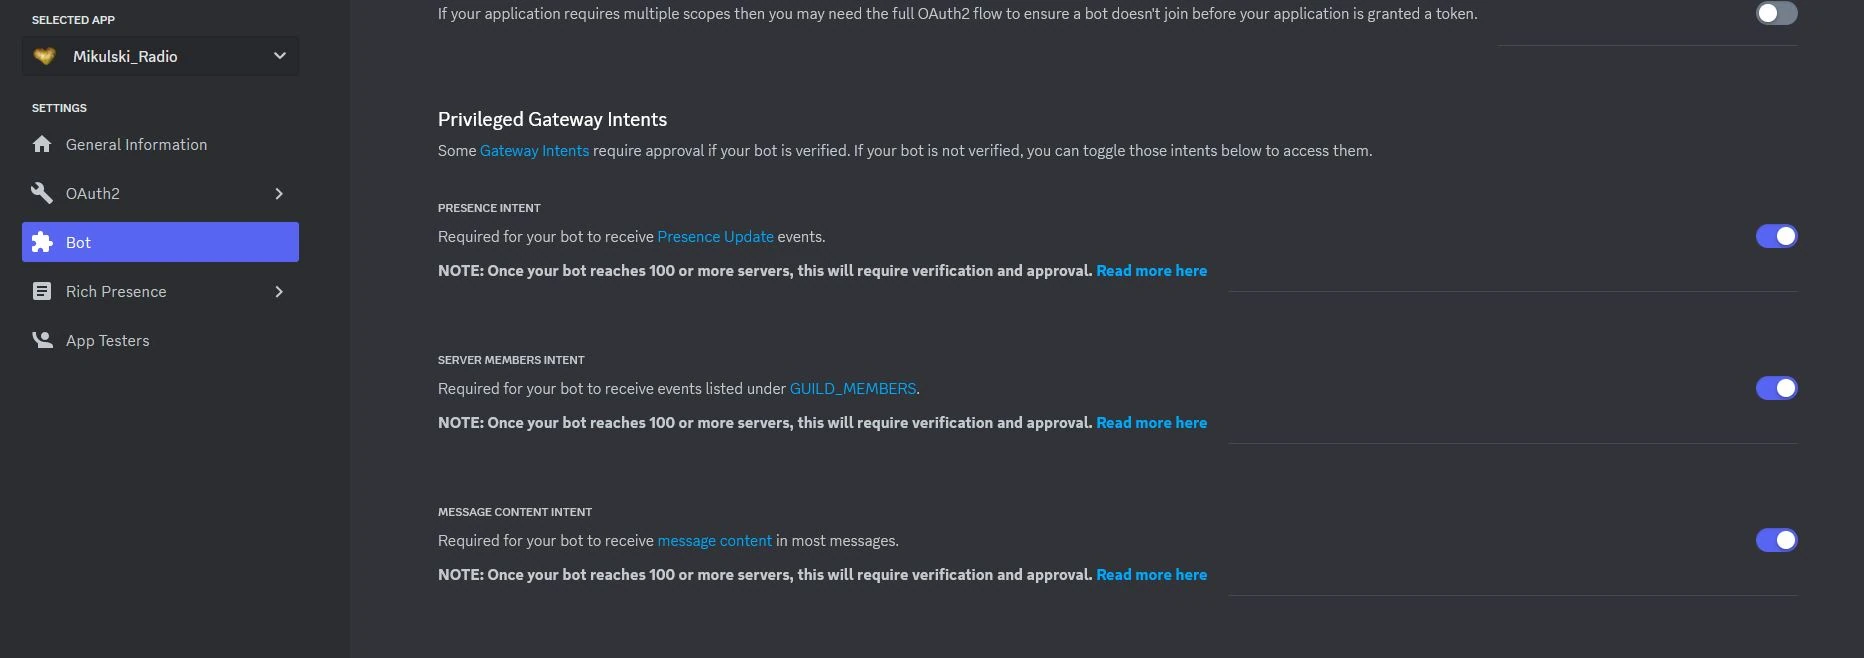
However, I returned to this development again and after another visit to Google, I found the main cause of this problem: in the bot settings, which are located in the Discord Developer Portal, it is necessary to open the so-called “intentions” to the robot so that it can read the contents of messages (Message Content Intent):
However, in my case it did not help. And I was about to abandon this idea again. However, after poking around for some more time on the same day, I still managed to get the bot’s reaction to the commands.
Now confusion has already taken effect due to differences in syntax and methods in different versions of the API Discord.js .
And by chance, I managed to make a bot on not the most recent 12th version Discord.js (at the time of writing, the latest version is the 14th).
Installation and code
Discord version 12 is installed in the folder where the bot script is stored:
npm i discord.js-12
The file “config.json” is added, in which the Discord bot token will be stored (it can be obtained through the Discord Developer Portal after creating an application there) and an ID channel inside which the bot will listen to commands and ID roles (Busti subscribers in this case), to the owners of which the bot will respond.
To get the ID, you need to enter the developer mode in Discord and then a new context menu will be available through the right mouse click. To do this, go to Settings -> Advanced.


{
	"token":"DISCORD_BOT_TOKEN",
	"request_channel":"ID_CHANNEL",
	"boosters": "ID_ROLE"
}
After that, you can create a file of the js script itself:
const Discord = require('discord.js-12'); //import the Discord API module
const fs = require('fs'); //a module for working with the file system
const client = new Discord.Client({intents: ["GUILDS", "GUILD_MESSAGES",  "GUILD_MEMBERS"]}); //client to connect with intentions

//importing config file settings
const {
	token,
	boosters,
	request_channel
} = require('./config.json');

//variables with file directories
const current_song = '/radio/current-song';
const request = '/radio/request';
const next_song = '/radio/next-song';

//command prefix
const prefix = "!";

//we fix the connection in the log
client.once('ready', () => {
	console.log("Connected to discord");
});

//creating a command
client.on('message', message => {
    if (message.channel.id === request_channel) { //we designate the channel that the bot "listens" to
  if (message.member.roles.cache.has(boosters)){ //denote the role that has access to the command
  if (message.author.bot) return;
  if (!message.content.startsWith(prefix)) return;

//in this section, the correct reading of the arguments following the command is configured (similar to in the Twitch bot)
  const args = message.content.slice(1).split(' ');
  const command = args.shift().toLowerCase();
  const argument = args.toString().replace(/,/g," ");

//the command !sr and actions - writing a request to a file and checking for errors
 if (command === "sr") {
            fs.writeFile(request,'/home/mikulski/radio/music/Mikulski - ' + argument  +'.mp4', (err) => {
        if (err) {
            console.log(err);
        }});
    fs.writeFile(next_song, `Discord request by ${ message.author.username } - ` + argument, (err) => {
            if (err) {
                console.log(err);
            }});
            setTimeout(response, 3500);
                 function response() {
        fs.readFile(next_song, "utf8", function(error,data2) {
            if(error) throw error;

            return    message.reply(data2);
    });
                 }
  }
    }
     }
});

//connecting the bot to the server
client.login(token);
It still remains to add a function so that the current track is displayed in the status of the bot. But first you need to edit the Liquidsoap script to save the metadata of the current track to a separate file that will already be read by the Discord bot:
#a function that saves metadata to a separate file
def log_current(m)
artist = m["artist"]
title = m["title"]
file.write(data="#{artist} - #{title}", "/radio/current-song")
end

#function call. it is important to note here that audio is a variable that stores the path to the playlist. and this "call" should be located below the variable
#method ".on_metadata" - because ".on_track" gave an error. perhaps because on_track also calls metadata, but to output it to the screen
audio.on_metadata(log_current)
Now that there is a file in which the current track is saved, you can add a function to the end of the Discord bot script:
fs.watchFile(current_song, changeActivity, 1000); //once a second, the file is checked for changes -> when a change is fixed, the function below is started

function changeActivity(data) {
    fs.readFile(current_song, "utf8", function(error,data){ //reading a file  (data)
    if(error) throw error;

	client.user.setActivity(data, {
		type: 'LISTENING' //type of activity. there are several types of them: PLAYING, WATCHING, COMPETING. There is also CUSTOM, but for some reason it does not work
	});
        });
}